

Compression Strut Fittings
My next step was to procure the compression strut fittings for the wing. These pieces look like little flying saucers. Well, these are available from Wag Aero for about $20 each. The wing needs 16 of these so the price would be about $325 or so with shipping. Well, I am way to cheap to go that rout. So, I thought about some alternate ways to make the struts. The struts are also used to secure the drag and anti drag wires that crisscross the wing. I did attempt to make my own die and punch and had pretty good luck but without a lathe, it was not going to happen. I checked the Wag Builders yahoo site to see how to do this with out spending so much $$$. Another builder sent me pictures of a die and punch he made and the finished fittings. After an exchange of emails, he graciously agreed to lend me the tooling so I could make my own. The local steel supplier had the 18g mild steel and to Sears had the hole saw and I was ready to go. How much is all this costing? The steel was about $10, and the hole saw was $16. Shipping the die both ways about $28 so less than $60 for everything. Not bad. Yes I did save a bunch of money but it did take me about a week (maybe 20 hours) to make them. I decided to make two sets since I was set up so I made a total of 34 of the fittings. Second wing some day??? Another project??? Who knows? My cost was about $2 each. It cost me $60 to make about $750 worth of parts. Not a bad savings and I learned a lot. Now for some pictures:
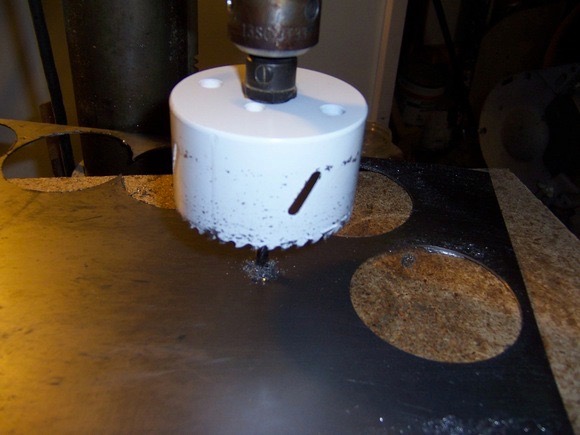 Here
is the hole saw being used to cut the disks. The center hole was than drilled
out to 3/8″ to fit the tooling.
Here
is the hole saw being used to cut the disks. The center hole was than drilled
out to 3/8″ to fit the tooling.
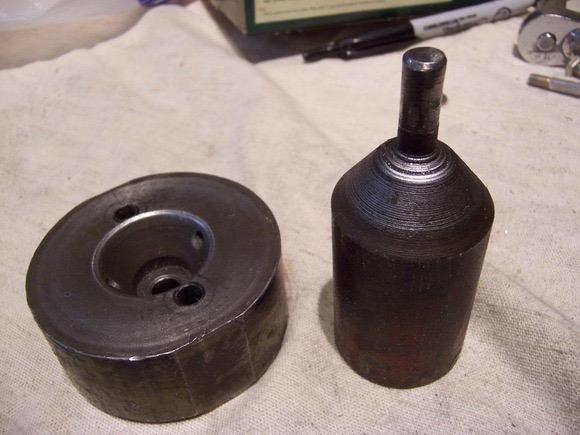 Here is a picture of the borrowed punch
and die. Thanks Keith!
Here is a picture of the borrowed punch
and die. Thanks Keith!
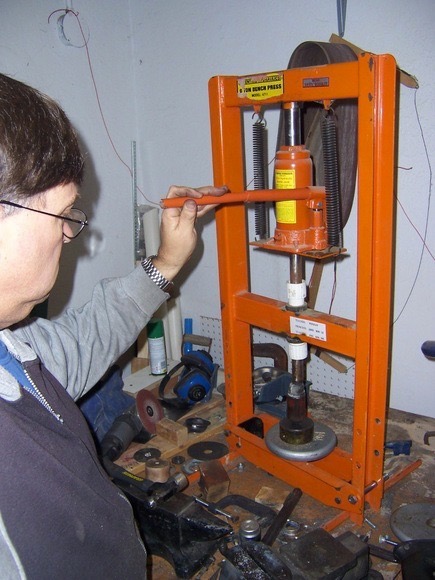 I used a press to form the parts with
the die. The edges tended to curl up some as I applied pressure so I used
a wooden block and hammer to flatten things a couple of times during the
forming process.
I used a press to form the parts with
the die. The edges tended to curl up some as I applied pressure so I used
a wooden block and hammer to flatten things a couple of times during the
forming process.
 I told you it
looked like a little flying saucer.
I told you it
looked like a little flying saucer.
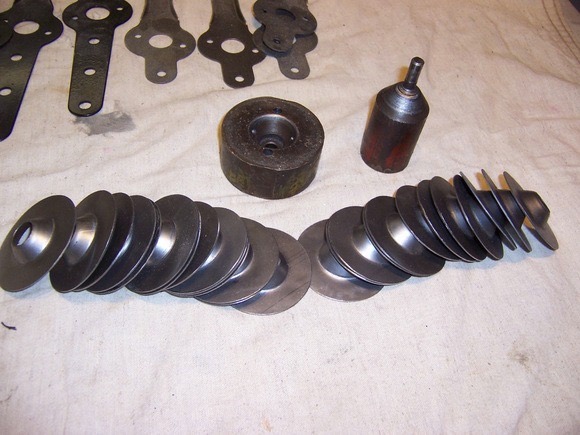 Here are all
the formed pieces before drilling. The die has guide holes for the
drilling. I wound up having to drill the holes than ream them a little
oversize so they would fit the lift strut attach fittings but I think that will
work out just fine. I reamed then to .261 for a 1/4″ bolt. Normally I would not want
this large a hole but the bolts are in compression not shear so I think it will
be ok. The holes for the bolts in the spars will be about .252 for the
1/4″ bolts so things
should be snug.
Here are all
the formed pieces before drilling. The die has guide holes for the
drilling. I wound up having to drill the holes than ream them a little
oversize so they would fit the lift strut attach fittings but I think that will
work out just fine. I reamed then to .261 for a 1/4″ bolt. Normally I would not want
this large a hole but the bolts are in compression not shear so I think it will
be ok. The holes for the bolts in the spars will be about .252 for the
1/4″ bolts so things
should be snug.
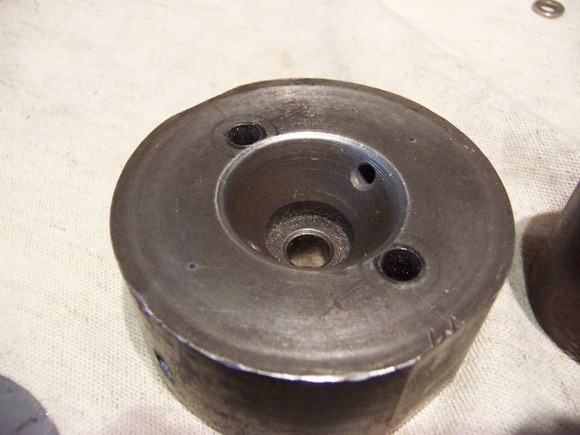 This picture
shows the guide holes nicely for the drilling.
This picture
shows the guide holes nicely for the drilling.
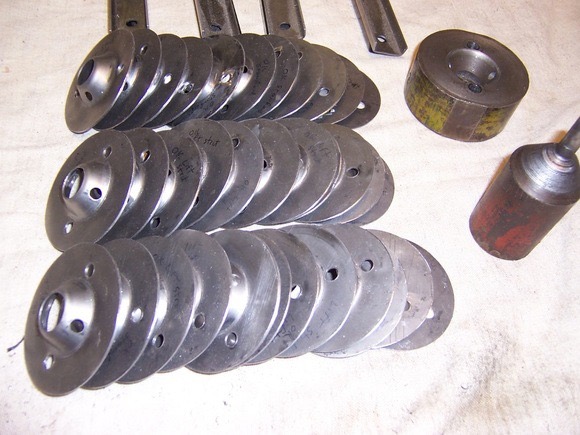 Lots of finished fittings! Each
hole had to be de-burred and all the edges had to be sanded. Like all
scratch built parts these did take a lot of time but most of it was during two
snow days from work so it was like free money! Love working in the snowy
mountains and living in the dry desert!!!
Lots of finished fittings! Each
hole had to be de-burred and all the edges had to be sanded. Like all
scratch built parts these did take a lot of time but most of it was during two
snow days from work so it was like free money! Love working in the snowy
mountains and living in the dry desert!!!
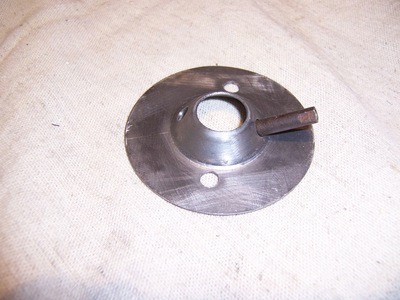
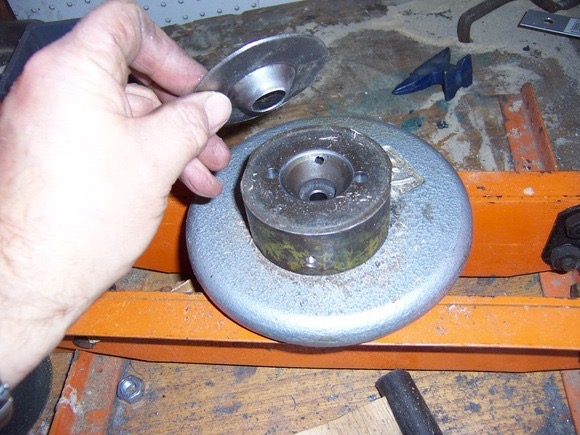
 This is the finished product with the
nipple for the drag wire in place. All in all, I am very happy with the
outcome and savings. I also learned a lot and that is the name of the
game. My next step will be to put the ribs onto the wing spars and weld
up the compression struts and start bolting things in place.
This is the finished product with the
nipple for the drag wire in place. All in all, I am very happy with the
outcome and savings. I also learned a lot and that is the name of the
game. My next step will be to put the ribs onto the wing spars and weld
up the compression struts and start bolting things in place.
Return to Past Posts and Pictures by Date