

June 19, 2010
I finished the wing tip bow on the left wing and am now ready to begin the right wing. I will build up the leading edge and the false spar after the right wing is built to same configuration as left.
I decided to make my own wood bow for a couple of
reasons. First and foremost is the looks; I like the traditional wing tip
better than the glass tip. Second, I like bending wood. My first
bending experiences were building guitars and canoes. I used the same hot
pipe to steam the bow that I made 28 years ago to make my first guitar.
Last is cost (but a very big factor) of the wood bow. The fiberglass wing
tips with shipping cost about $500. My cost to make the wood bows?
$25 worth of ash and some scrap partial board for a jig. The piece of ash
I bought will yield four wing tip bows so the cost is about $6 each!
Bending the bows is not for everybody. I think you can buy two bows for
about $100 including shipping and that is still a saving over the glass
tip. There is nothing wrong with the glass tip, many builders and owners
will argue that the glass tips are better. Me, it’s about the
looks. So, How did this work? I stated by buying a piece of
White Ash 10′ long and about 6″ wide. I selected a piece with
very straight grain for steam bending. I cut the piece into pieces that
when finish planed were 1/4″ thick x 1″ wide, by 10′ long.
i had previously made a jig using particle board that matched the dimensions of
the Piper tip bow. The pictures will detail the process including the
bracing I used. I am very pleased with the outcome of the bows. I
was very impressed with the strength of the wing with the tip installed.
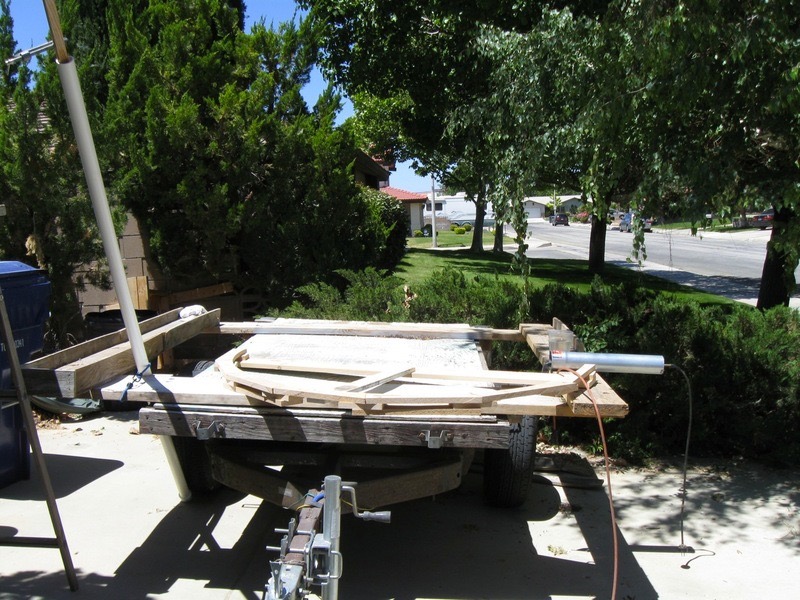
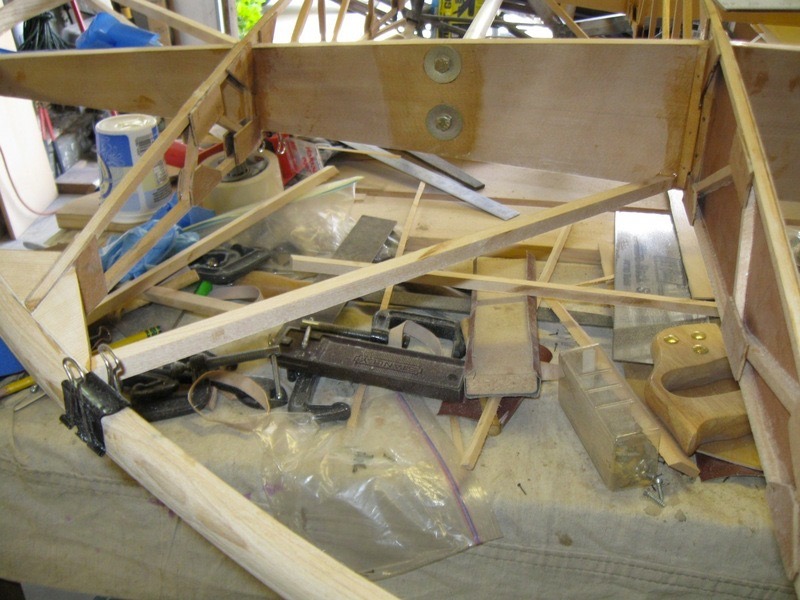
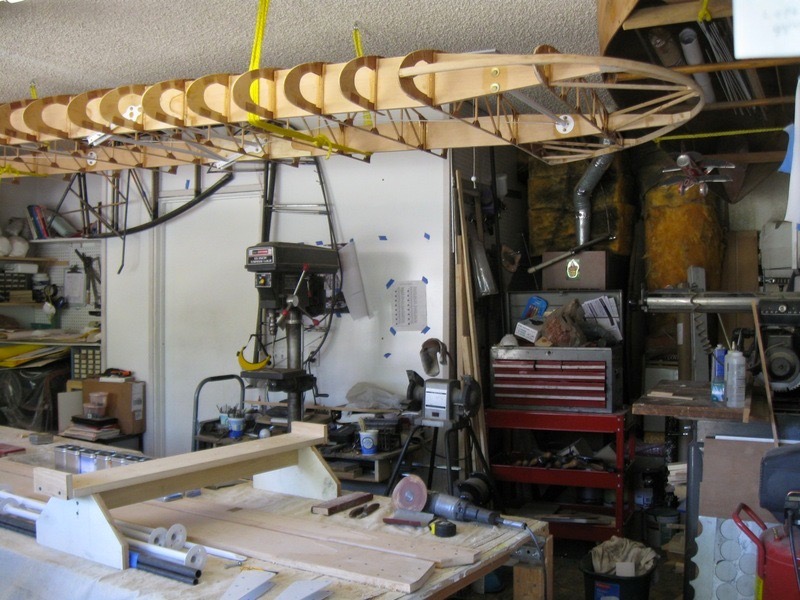
Here is my set up. I had to use my trailer for a work bench; no more room
in the shop! The PVC pipe holds the wood, pipe on right is my hot pipe
and my jig is on the bead of the trailer. I soak the wood in the pipe for
about 30 minutes, pouring in boiling water first. The hot pipe is used to
force the wood into the internal structure of the wood; softening the lignum
allowing the wood to be reshaped and retain the shape after drying in the jig.
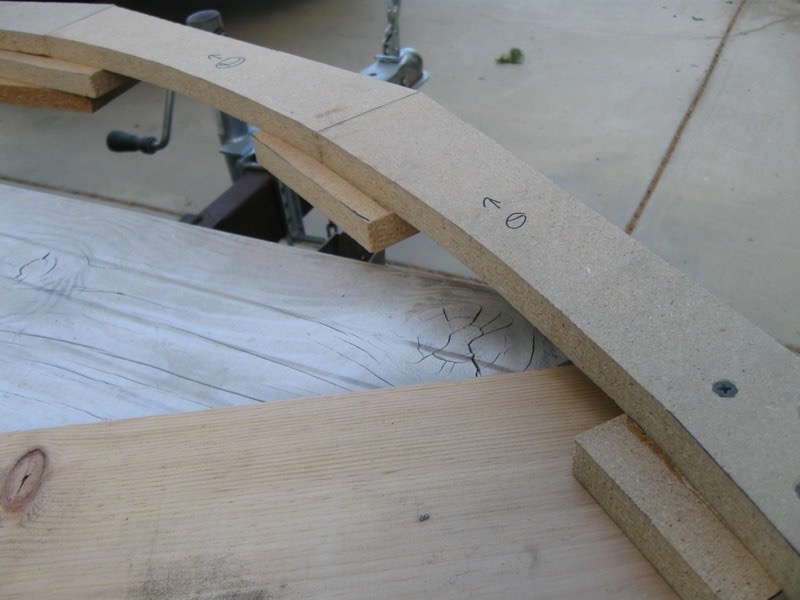
Close up of the jigs. I latter drilled holes for “C” clamps, easier than
the cheap Harbor Freight bar clamps I first used for drying the wood.
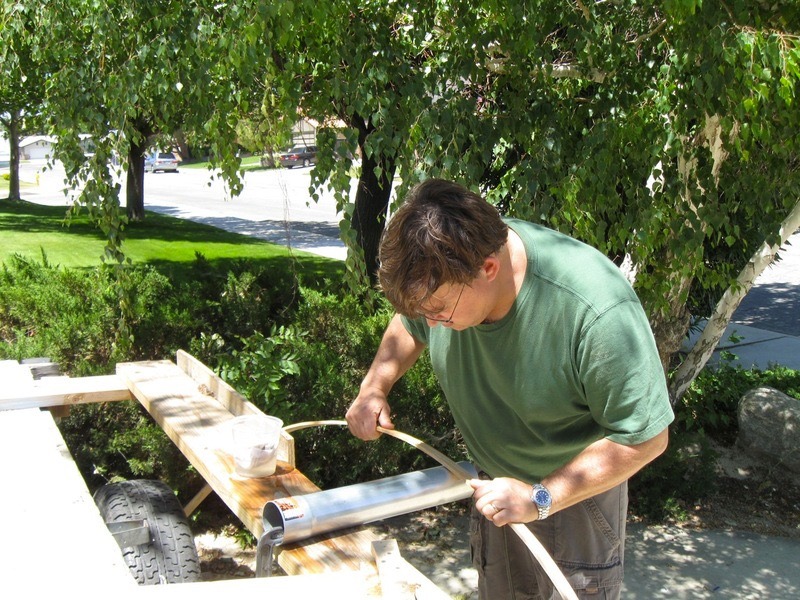
Here I am bending the wood against the hot pipe. I have a heating element
inside that I found 25 years ago. You can use a metal BBQ lighter
(electric wand type) bent and placed inside the pipe, The pipe is a 3″ exhaust pipe
extension ($8) from Chief Auto Parts. Can you say CHEAP??? You
simply apply pressure, re wet with a rag, move along wood, bend, and keep
checking with the form for fit. It really is pretty easy (ok, I’m a
Industrial Arts teacher, 3o years of wood working so I am biased here) to get
the hang of it.
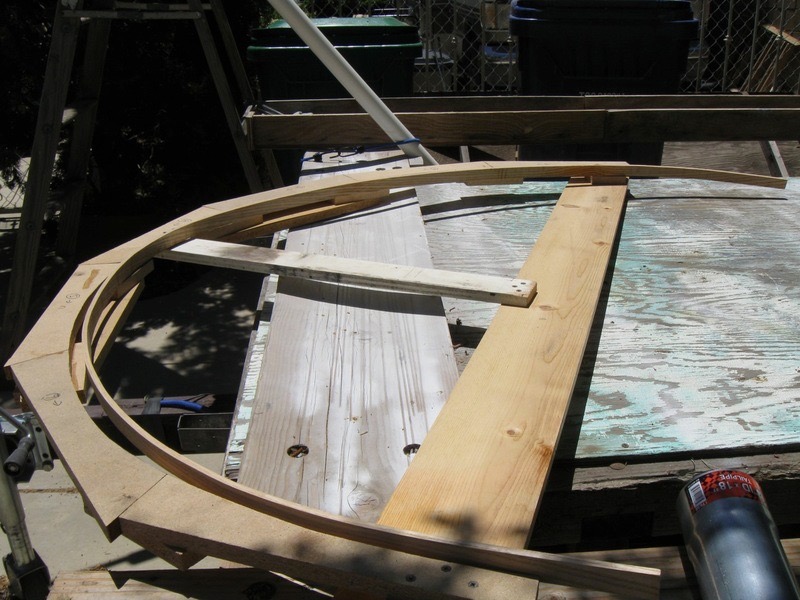
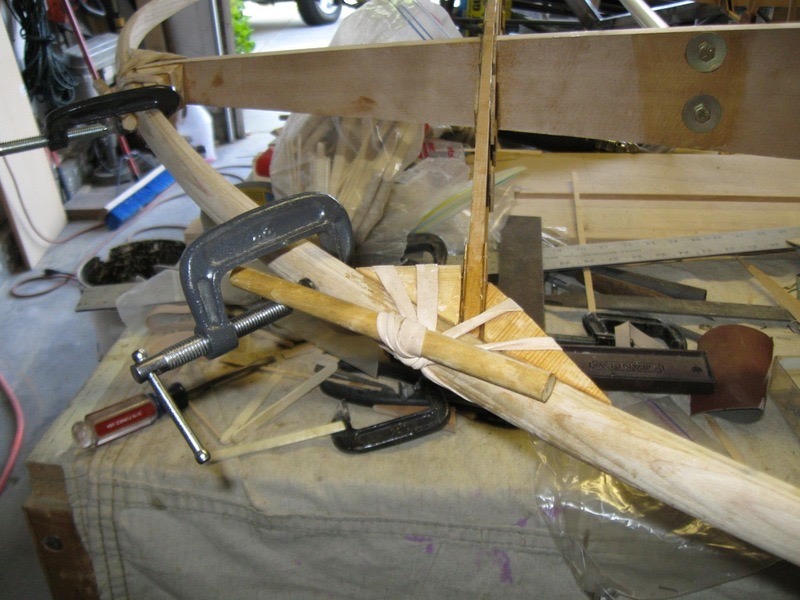
Keep checking the fit with the pattern. You can see it holds it’s shape
without any clamps. Bend a second piece the same way.

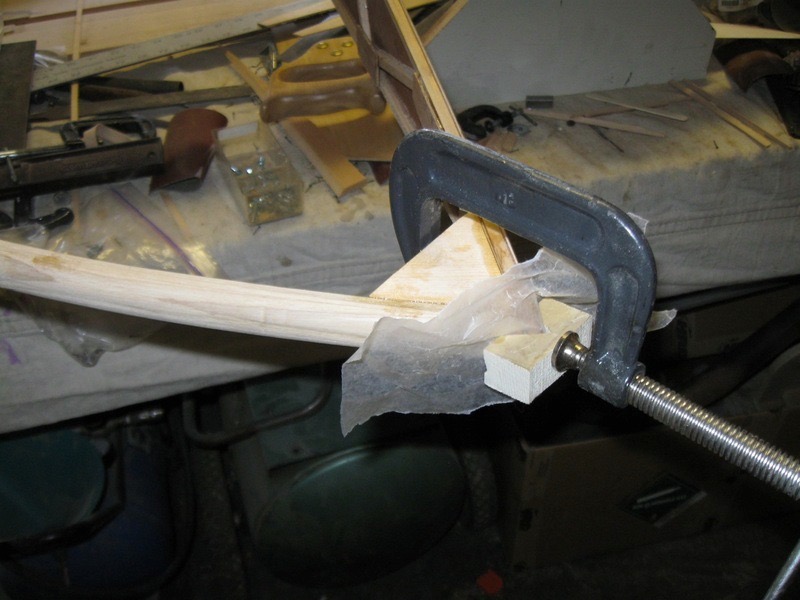
The two pieces are clamped in place to dry. I chose to use two pieces of
1/4″ glued
together to make a bow that would better hold it’s shape after everything was dry.

I let the pieces dry for three days before removing from jig. You can see
the spring back. Next, laminating with T-88 structural Epoxy.
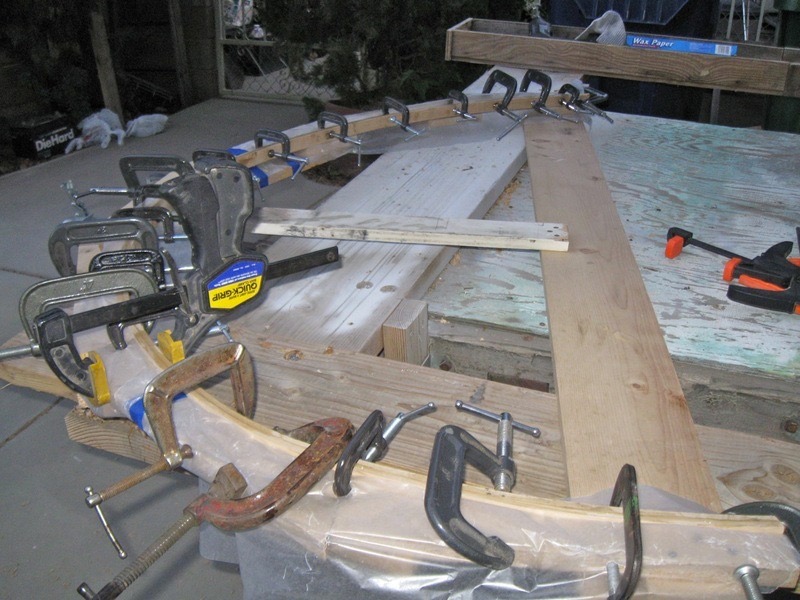
I used wax paper to keep things from sticking to the jig. Lots of “C”
clamps needed for this step.
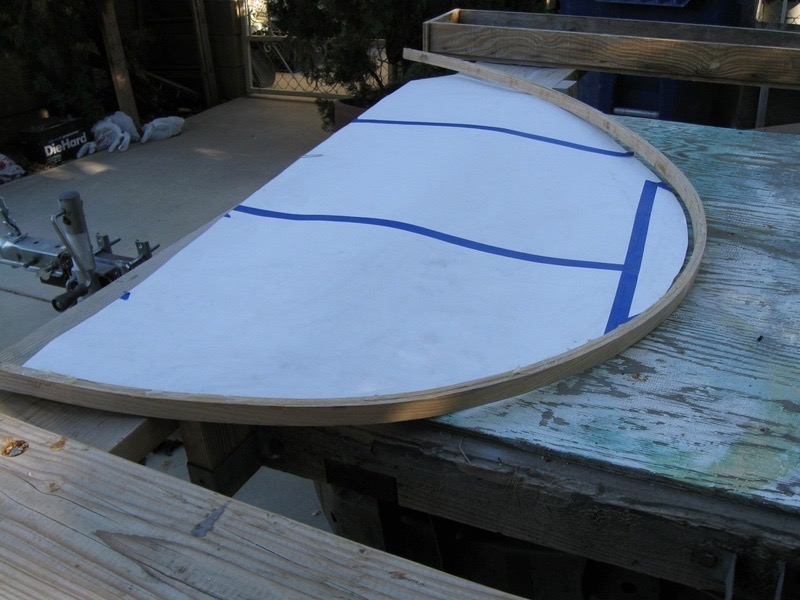
After the epoxy dried over night it was removed from the jig. You can see
here that it matches my pattern with no spring back at all. The nice
thing about this over solid bows from suppliers is that there is no pressure on
the spars or ribs when fitting to the wing. Next step was to use a 1/2″ round over
router bit to profile the outer edge. The drawings call for a taper
toward the end of the bow; I added this after glued in place.
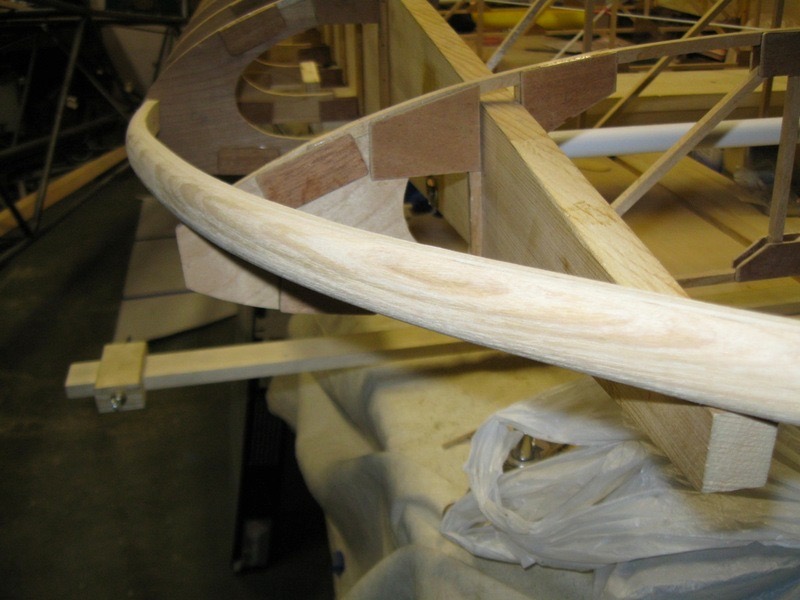
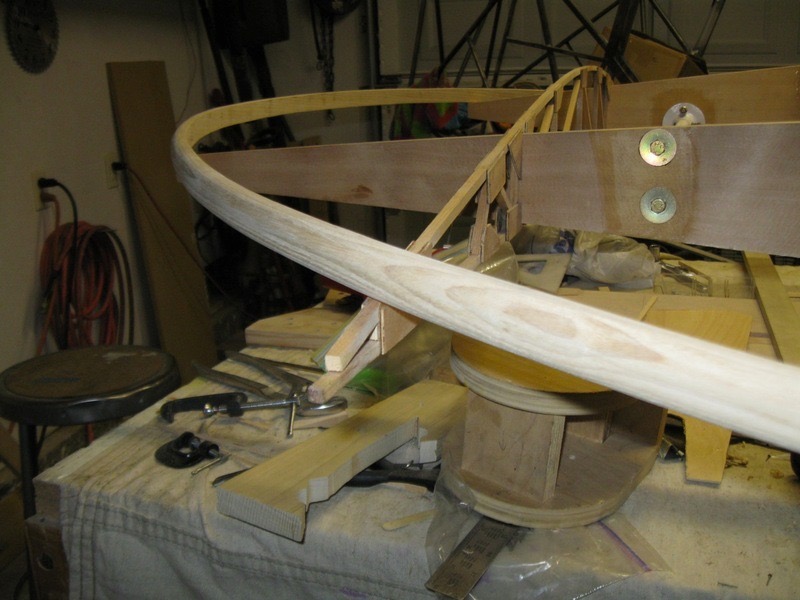
Routed and beginning the fitting. See how nice it is to not have any
spring back? Needless to say, I like working with wood.

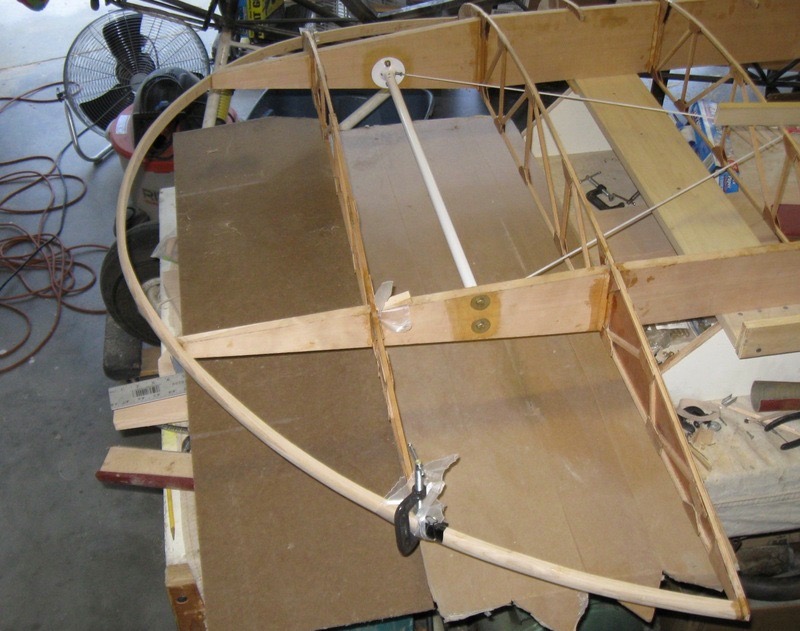
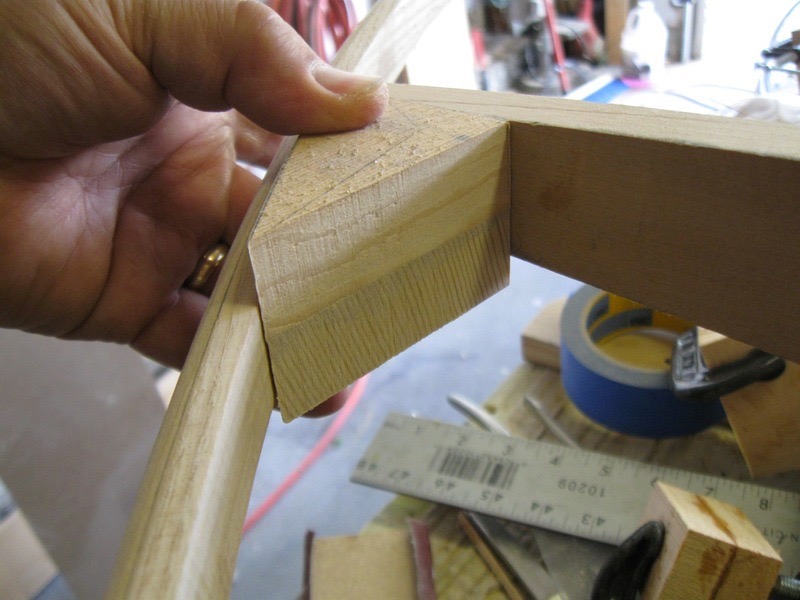
Here I am fitting the bow to the spars. Don’t do any final spar cutting
until you have the bows in hand and ready to install. I have a drawing
posted here to show all critical dimensions.
More fitting; not to difficult at all.
Fitting up front. I used a screw to hold in position here and at aileron
bay rib while the glue dried.
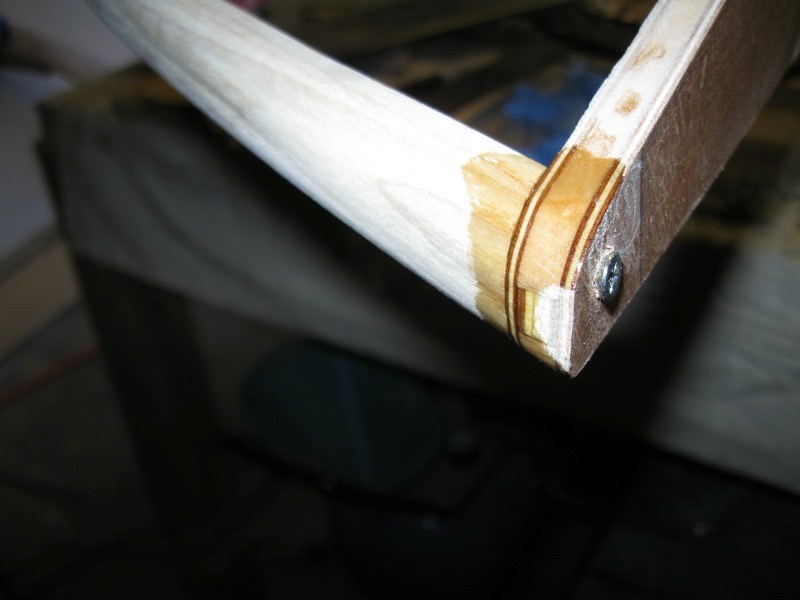
Holding things in place as the glue dries.
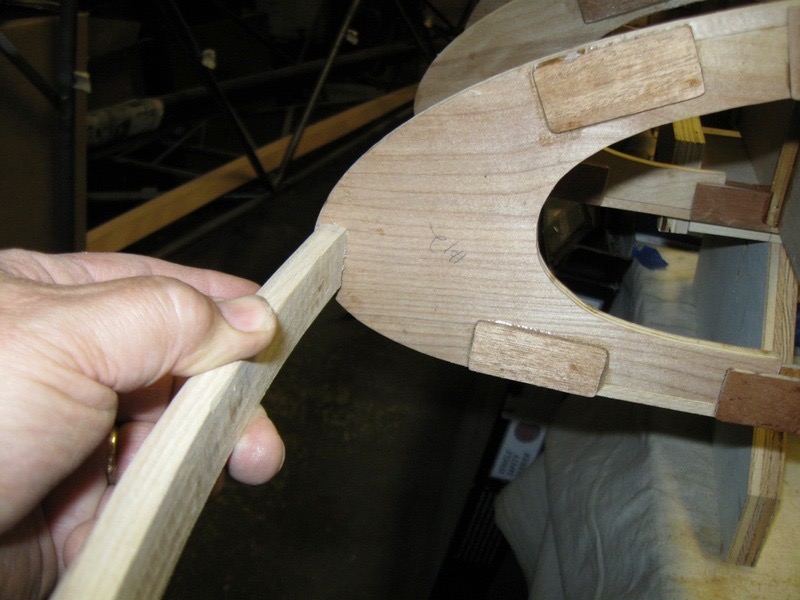
Before you glue things in place make sure you do any reshaping necessary on the
tip rib. Here I have the reshaped rib over the tip rib for the other
wing.
The bow is glued first to the spars and aileron bay rib, not to the tip
rib. I decided to do my glueing in steps. this does take time with
over night drying of glue but worth the wait for me.
Next I glued in the tip rib. I needed to shim it up from the bottom to
get a look that seemed right for the fabric to attach latter. I had to
decide the location for the tip rib myself. It is close to the location
on the Wagabond. The 2+2 drawings have nothing for a bow wing tip so I am
on my own here.
Shimming the tip rib up to get a good line for the fabric. Others may not
ned the shimming depending on the location of the tip rib.
 Front tip rib
shimming was just a little bit more.
Front tip rib
shimming was just a little bit more.
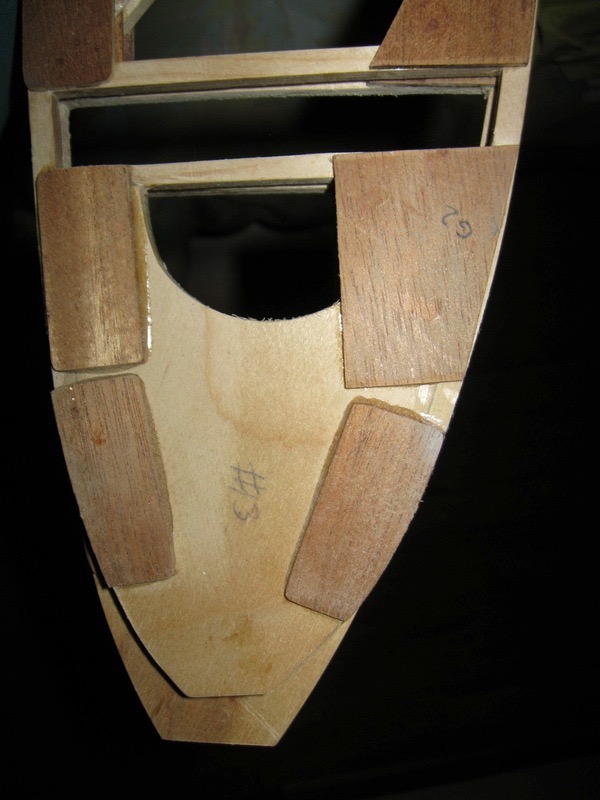
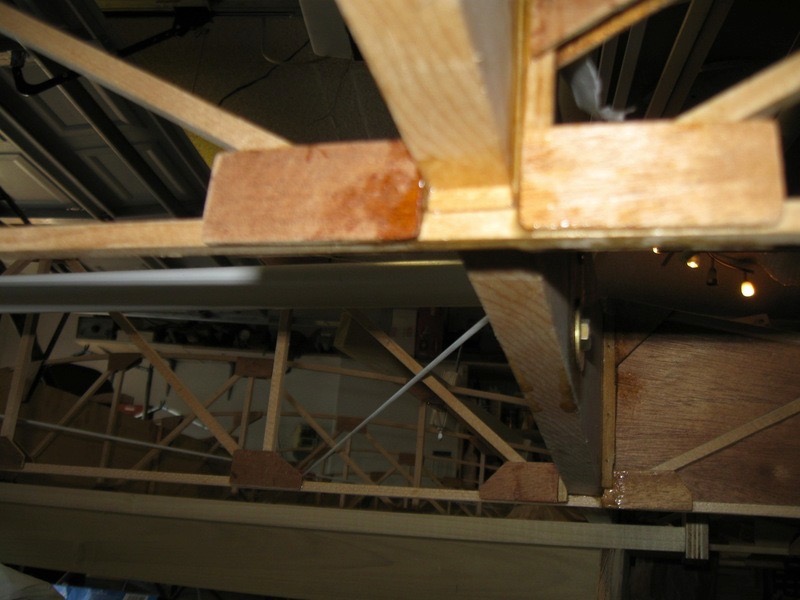
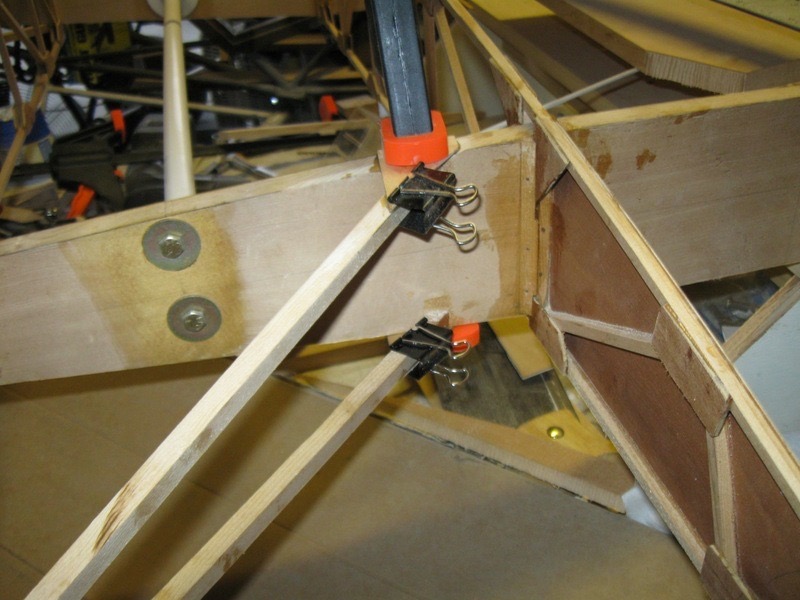
Next comes corner blocking. I decided not to use the metal brackets or
3/8″ metal channel
as shown on the Wagabond plans. I also looked at the Super Cub drawings
and they have double channel compared to the Wagabond; maybe due to more
vibration due to higher hp? Not sure so I opted to go with double 3/8″ square spruce
with these thick spruce corner blocks. I glued the blocks up alternating
the grain for better glue joints (less end grain exposed to the joint)
The blocks were carved to fit and glued in place. You will have to get
creative with your clamping.
More blocks glues in place.
The blocks are all glued in place and sanded to a nice profile to match the
bow. Very satisfying to sand everything to a nice smooth fit.
Next, beginning the bracing. Again, kind of difficult to clamp. I
used my air nailer here with very small brads to hold everything in place.

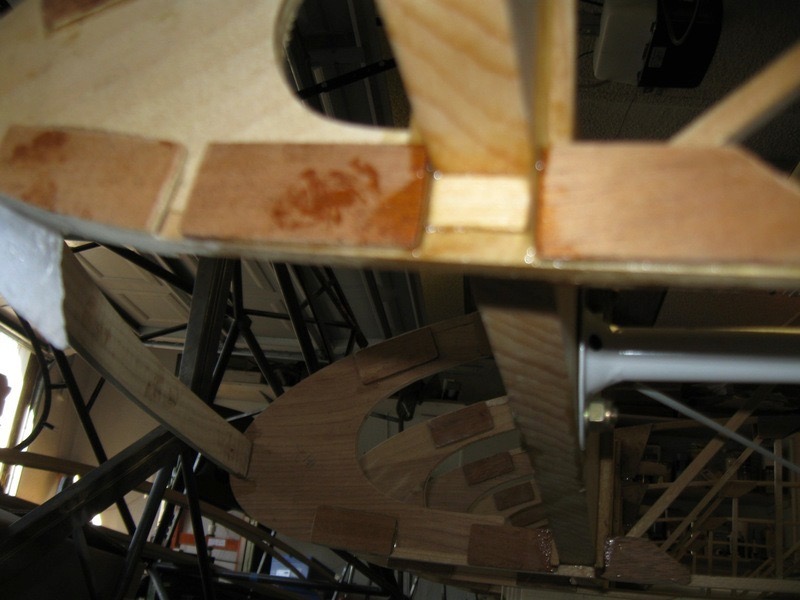
Gussets will be needed where blocks have only end grain presented for the glue
joint. These will be sanded and filled before final varnish is applied.
Another gusset in place.

The gussets sand down very nicely. They are only 1/16″ so won’t be
very visible at all.
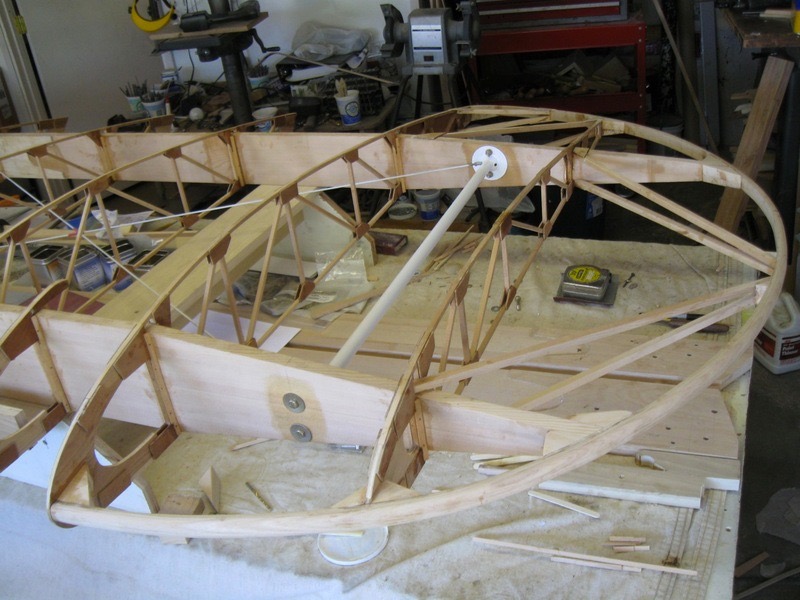
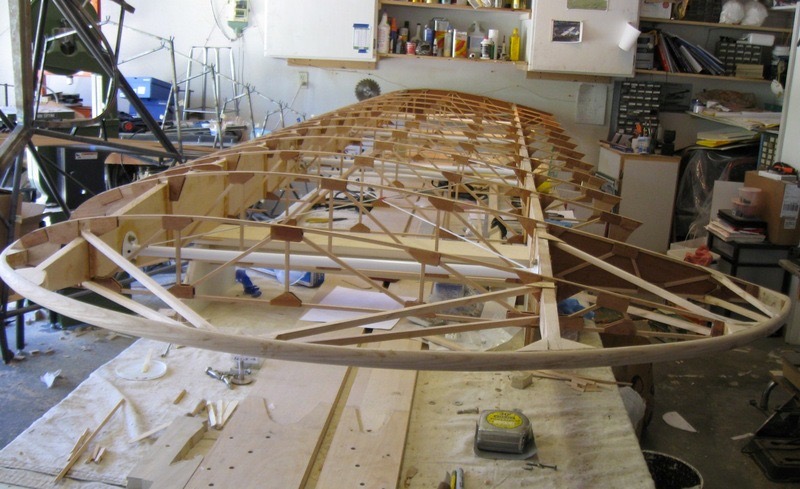
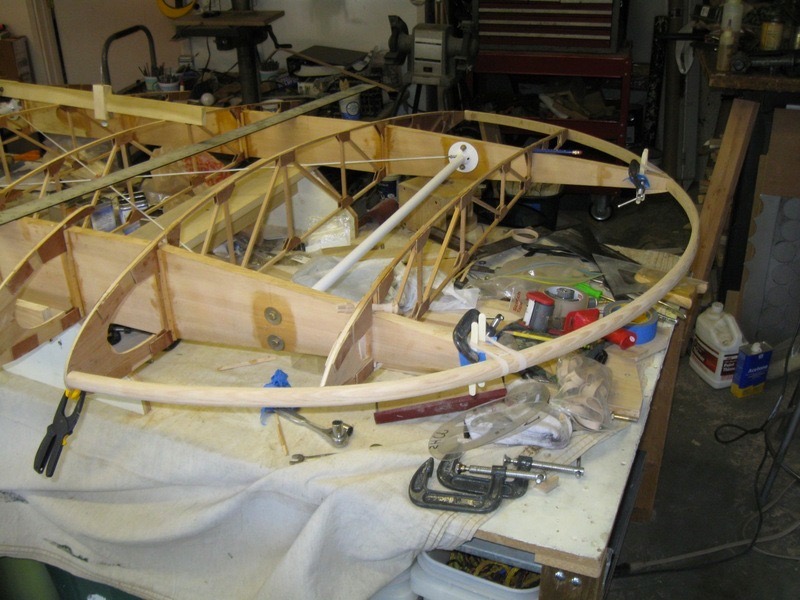
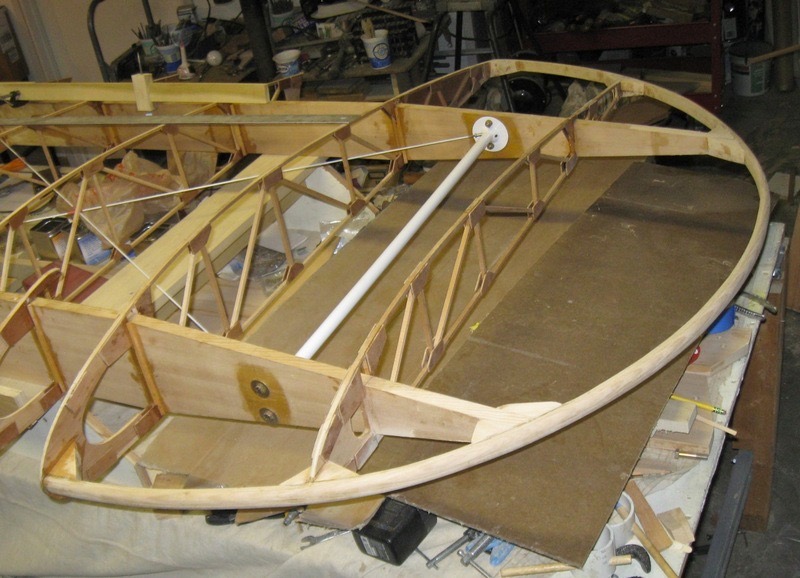
The finished wing tip!
 Another view showing the gussets needed.
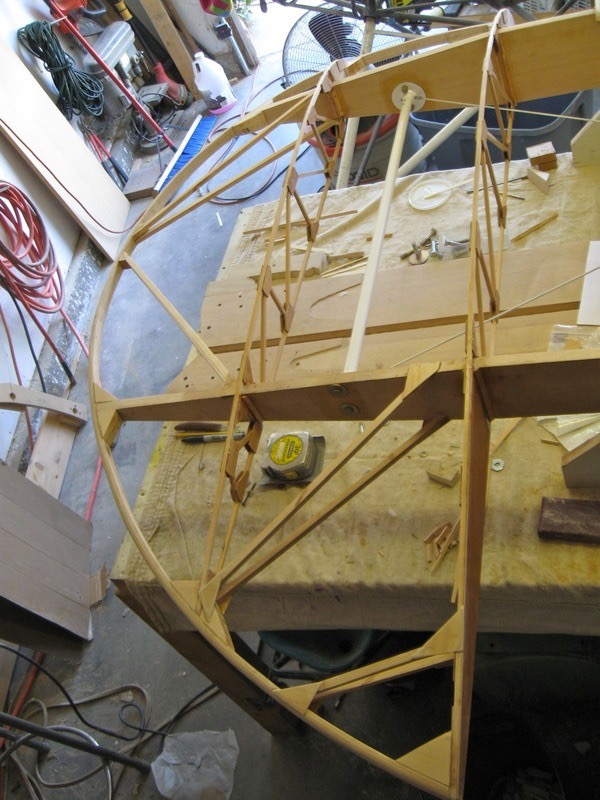
I just like this view; it now looks like a wing. I will build up the
second wing to this point before going ahead with the leading edge and false
spar.
Ready to begin the second wing. Everything is built so this should be
relatively quick.
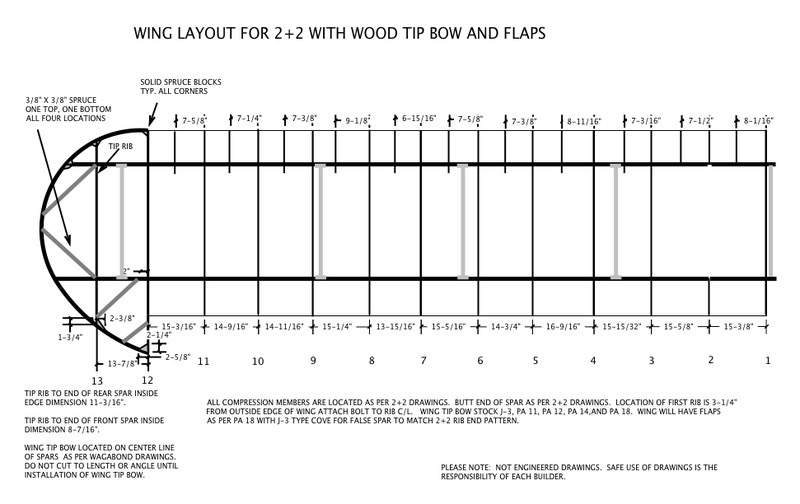
Here is a CAD drawing I made showing all the necessary dimensions that I came
up with for my wing using 2+2, Wagabond, and Sport Traveler wing
drawings. I should be starting my second wing on Monday or Tuesday.