

Wow! I didn’t realize I hadn’t updated since last April; way too long. I’ll try to make some sense out of what I have done over the last 6 months. I have had a lot of stops and starts and frustrations with the recient steps but am moving forward again. So here we go.
First I completed the hardware for the flap actuator. Second, I purchased pulleys with bearing for the for the aileron cables and made cages and guards. Third I made a wood cove for the false spar. Next I worked on the proper location for the aileron pulleys and cables; nothing in the plans for this. In the middle of all this I found a set of lift struts for my wings and figured out how to inspect the inside for any corrosion.
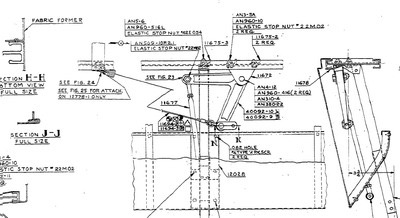
Flap Hardware: I thought the flaps would be difficult to add to the wing as they are not “stock” on the 2+2. As it turned out, I simply followed the Super Cub drawings and used or made stock parts. I did locate the hinges different so the bell crank would not have to mount where the wing attachment plates are fitted to the spar. Basically I used a left flap on the right wing and a right flap on the left wing. The correct hardware is located appropriately. To make this work custom flaps need to be made. My wood flaps were made to fit this mod. Below is the drawing that I used to locate all the parts for the flaps.
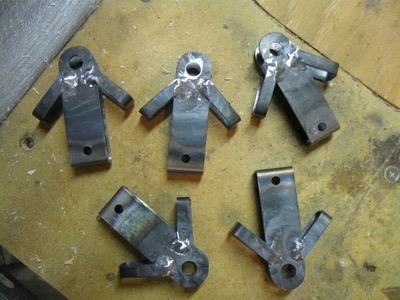
As I laid out the parts on the spar I realized I had to redesign the hanger to clear the bell crank. Not a big deal; I redrew the hanger using cad and adjusted the jig and rewelded the hanger as per the new design. The new design is below.
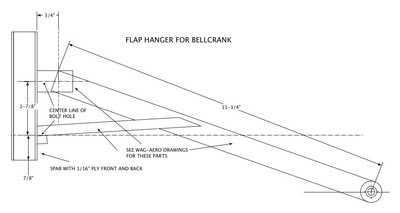 New flap hanger design for lower flap hinge point.
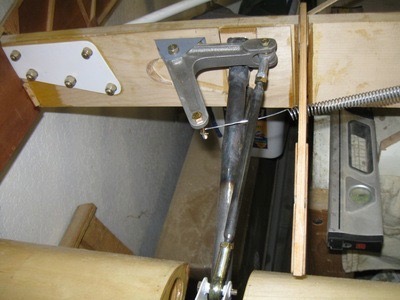 After installing the new hanger I installed the stock bell crank and hanger along with the push rod made to stock specifications. The spring I used to test everything came from Home Depot but was later replaced by the stock spring for the Super Cub.
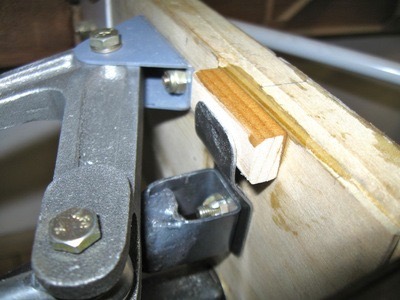 The small block of wood and plate under the hinge attach bolt is the stop for the bell crank. The stop keeps the beel crank from hitting the spar.
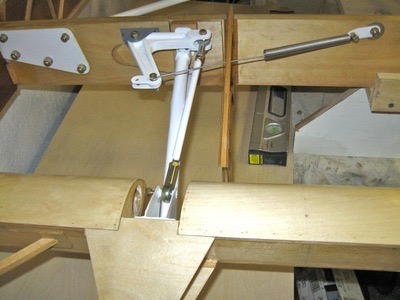 This picture shows the finished hardware installed after painting. The flap moves down very smoothly and retracts and stops in the full up position. Final adjustment is made by changing the length of the push rod.
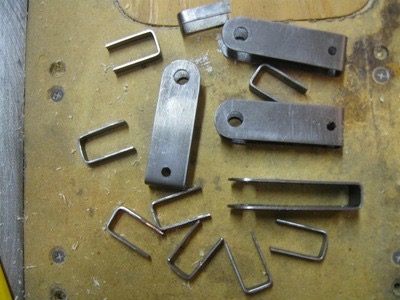 I fabricated all of the pulley hangers and cages. If I were to do this over again I would purchase them rather than make them. The time spent making all the parts was way too much. The cost is rather high for each part but I have realized that to finish the plane I need to start moving forward at a faster pace and not fabricate every part. Below are some pictures of the fabrication of the parts:
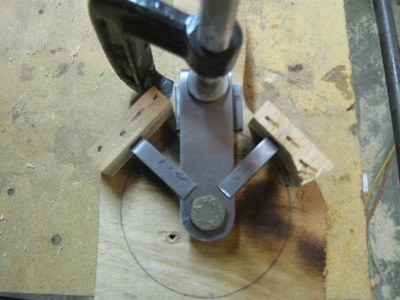 This is a simple jig used to tack weld the cable keepers in place.
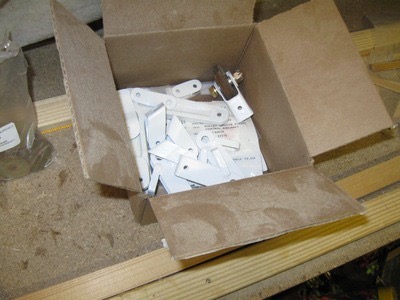
 Finished pulley cages before painting
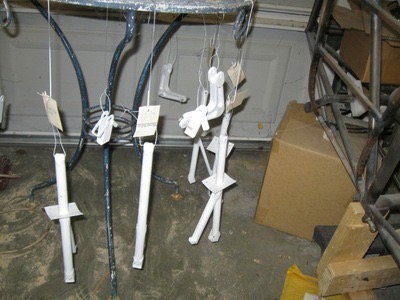 Painting
 Ready to install.
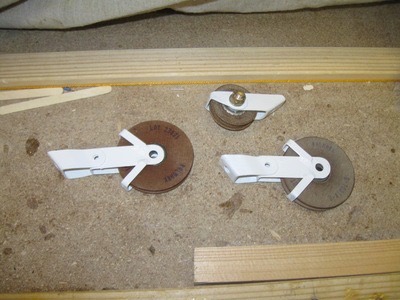 Cages with pulleys installed ready for the wing.
I spent about 40 hours making all the pulley hangers and cages. Cost would have been about $400. Don’t make them your self! Buy the darn things!!!!
Next I’ll show the wood cove false spar build up.
Return to Past Posts and Pictures by Date