

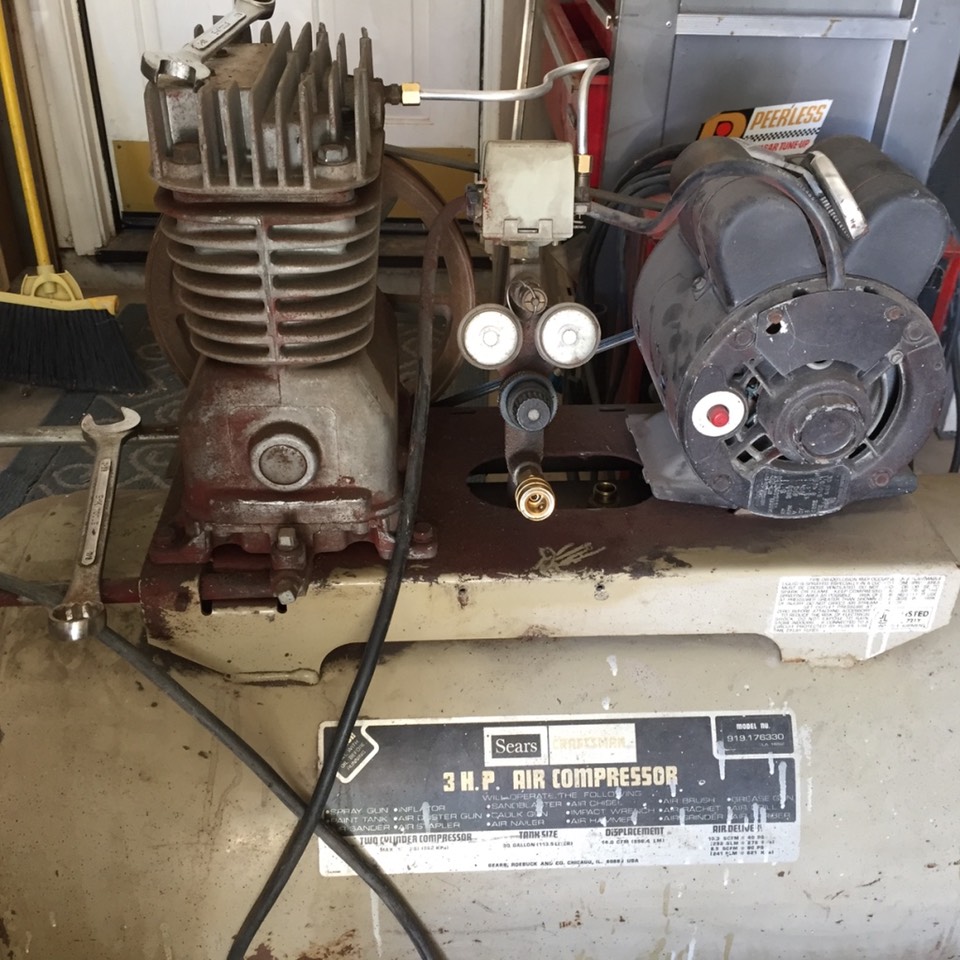
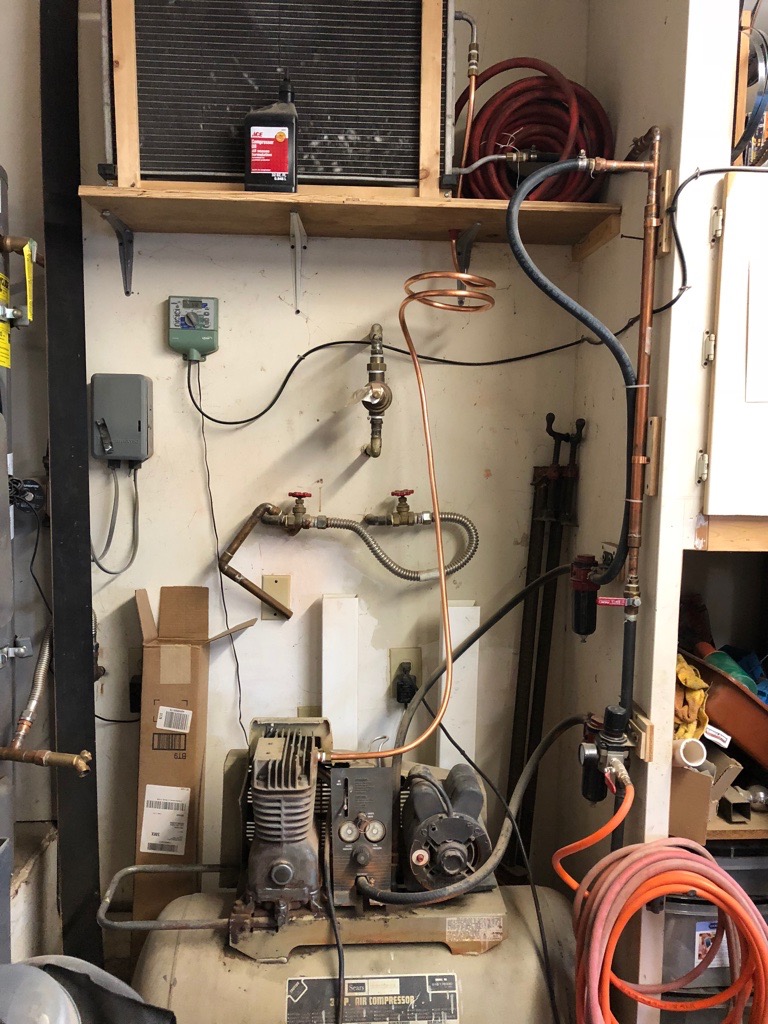
With the fuselage welding all finished, it was time to do some sandblasting. I am using a pressure sandblaster from Harbor Freight. The sandblaster works pretty well but I have found that my compressor is a bit small and I have issues with water. So, I decided to look for and purchase a better compressor. I also knew I would need to upgrade the compressor for painting so the search began. I quickly found a used 3hp, 14 CFM 220V compressor on Craigslist. About the same time, I came across a post on Supercub.org showing how to build a dryer for air compressors. So before I could complete the sandblasting and paint the fuselage I had to set up the new compressor. First shot is the compressor. You will notice I removed the line from the compressor to the tank. My dryer will be between these ports. First, the compressor.
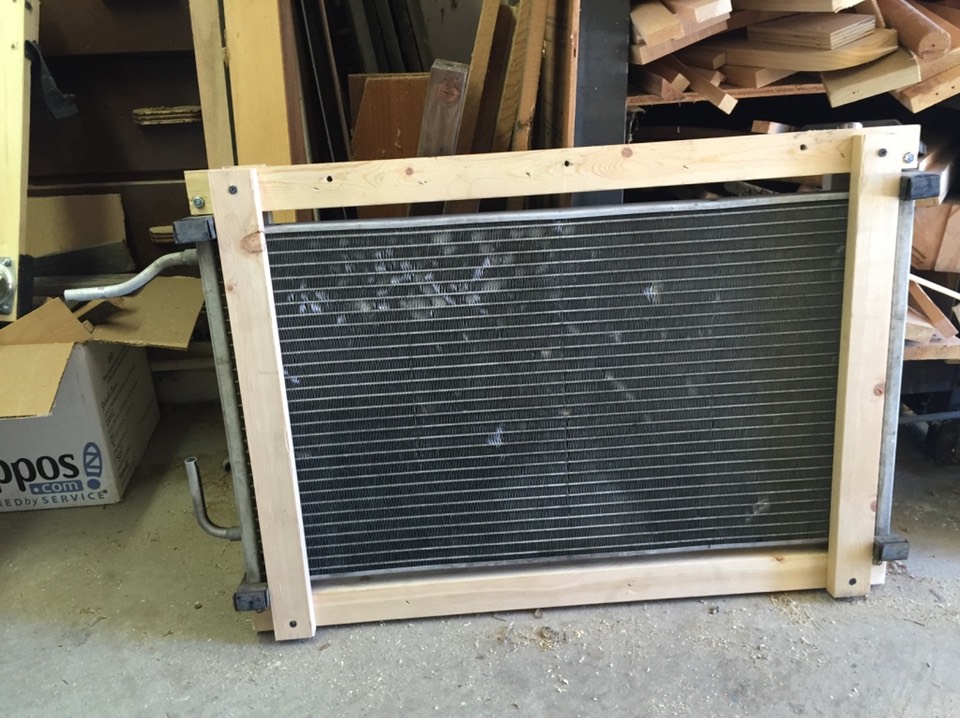
Next, the dryer. I copied the plan I found on line. I went to the junk yard, and bought an air conditioner condensor from a Chevy Tahoe. I wanted to remove it myself to see if it held pressure. The third one I checked was still connected and was holding pressure. I removed the condenser, brought it home, and washed it out with water. Next, I build a wooded frame to hold the condenser on an overhead shelf.
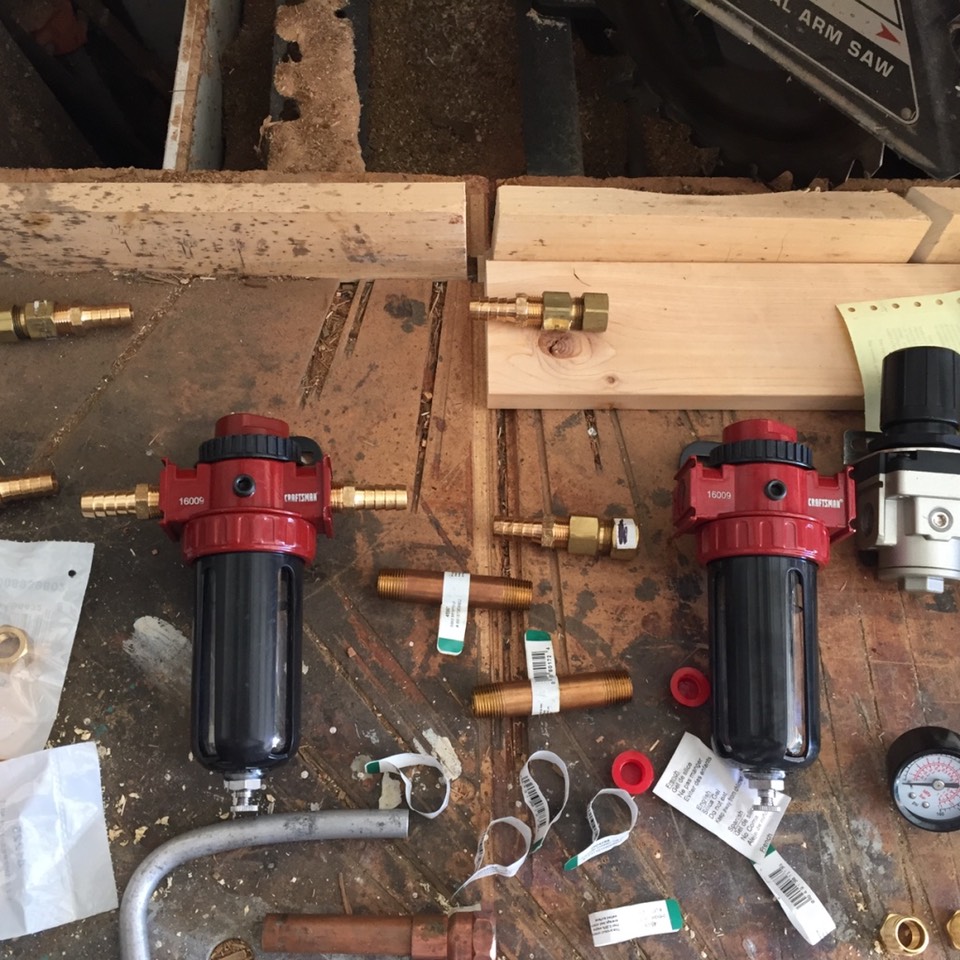
Next step, was the supplies needed to plumb the system and the water traps and regulators. I did a fair amount of research and settled on some hardware from Craftsman. They were a good price and identical to traps from other companies.
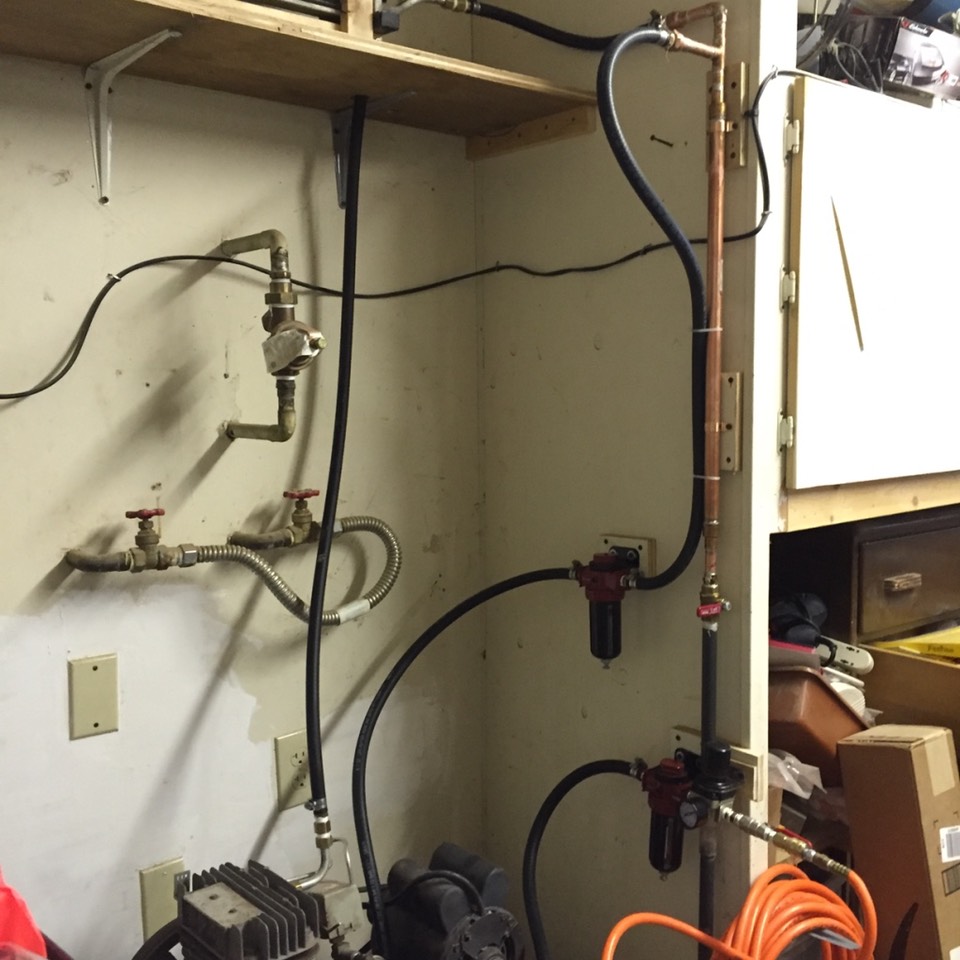
Next was plumbing. The set up I found on line used automotive heater hose for the connections. I first set it up that way but quickly found that the heater hose could not handle the temps right off the compressor. I switched to air compressor hose and that held up better. I needed a fan to keep it cool or it would burn through. I used this set up with a fan until I started doing a lot of fabric painting here at home. I have since plumbed with copper tube and no longer have issues with heat off the compressor. I’ll post pictures of the process and follow up with the current modified set up. Here’s the completed set up with the original heater hoses. The pictures do a pretty good explaining how everything fits together. The long gray pipe extending to near the floor picks up water that is heavy before it goes into the first water trap. From the first water trap, air goes into the tank. The outlet hose from the compressor is too hot to touch when running. The hose from the condenser is cool to the touch; no heat at all. This is what pulls the water out of the air. The air leaves the tank and goes through a final water trap/regulator. All connections need to be 3/8” connections for proper air flow (more on that later when I detail painting requirements). After running for an hour or so sandblasting, with the air compressor off, I check for water. The grey pipe will have about an ounce of water, the first trap about 3 ounces of water and the final trap at the regulator has never had any water. This set up works. My cost was about $150. Could have been less had I just plumbed with copper to start.
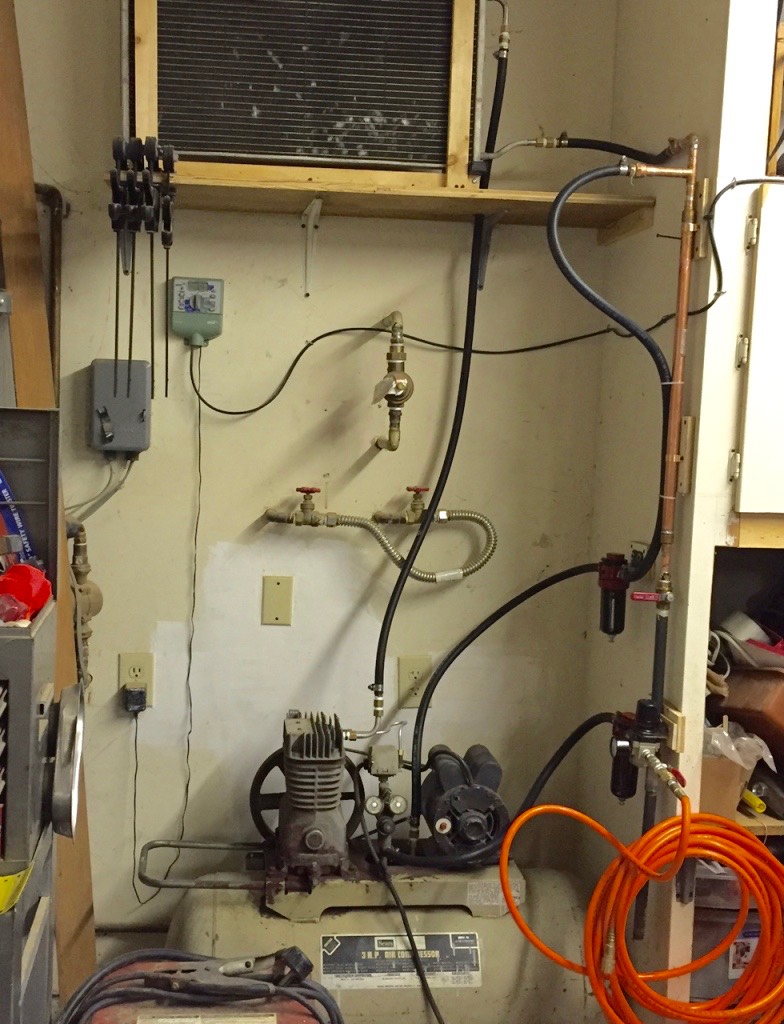
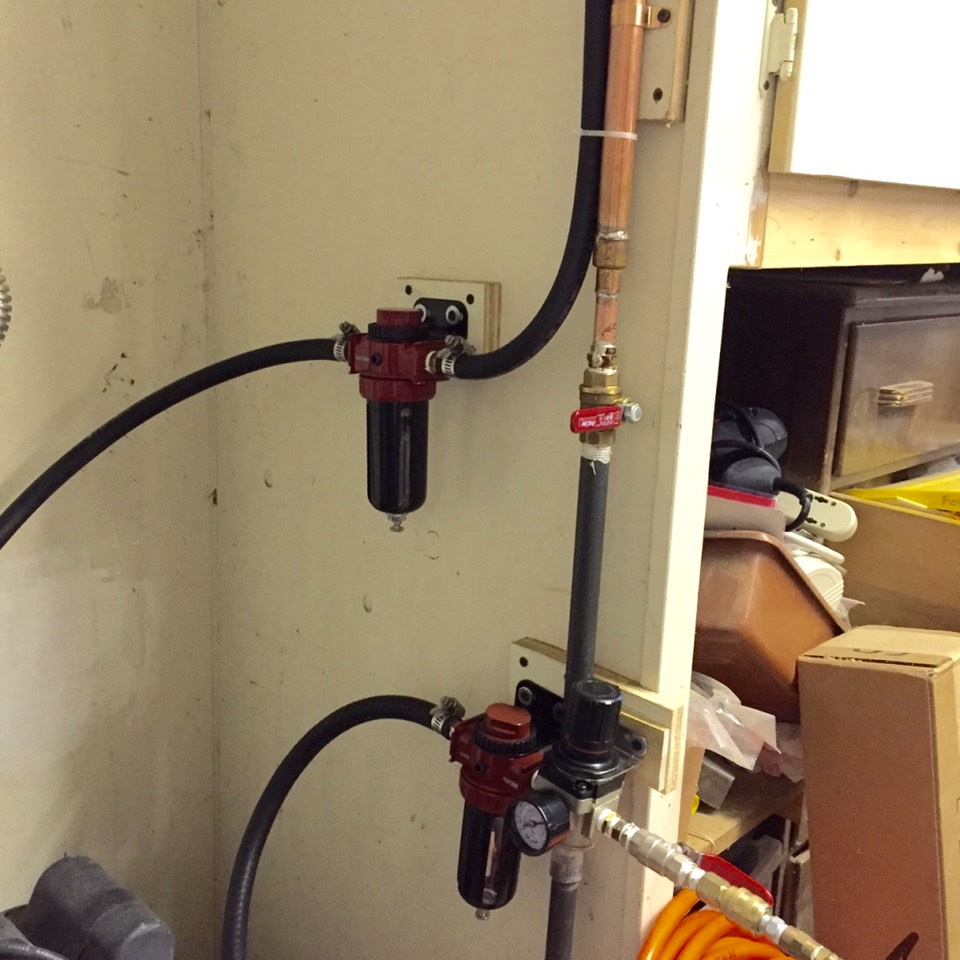
Here’s the current set up with the copper replacing the heater hose from the compressor to the condenser. So far, this has worked very well.
The coil at the upper section of the copper is there to allow for vibration in the tube without cracking. So far, so good.
Sandblasting was done over tarps so I could catch and reuse the medium. I wound up using regular sand blasting sand from Ace Hardware. I used lots of different products but this was the best. Use a good mask as sandblasting can cause lots of respiratory issues. The sandblasting took me a couple days. If you bring the fuselage to a commercial sandblaster be careful who does it. Commercial outfits can use too much pressure and the heat generated can warp and damage the lighter surfaces we use in an aircraft fuselage.
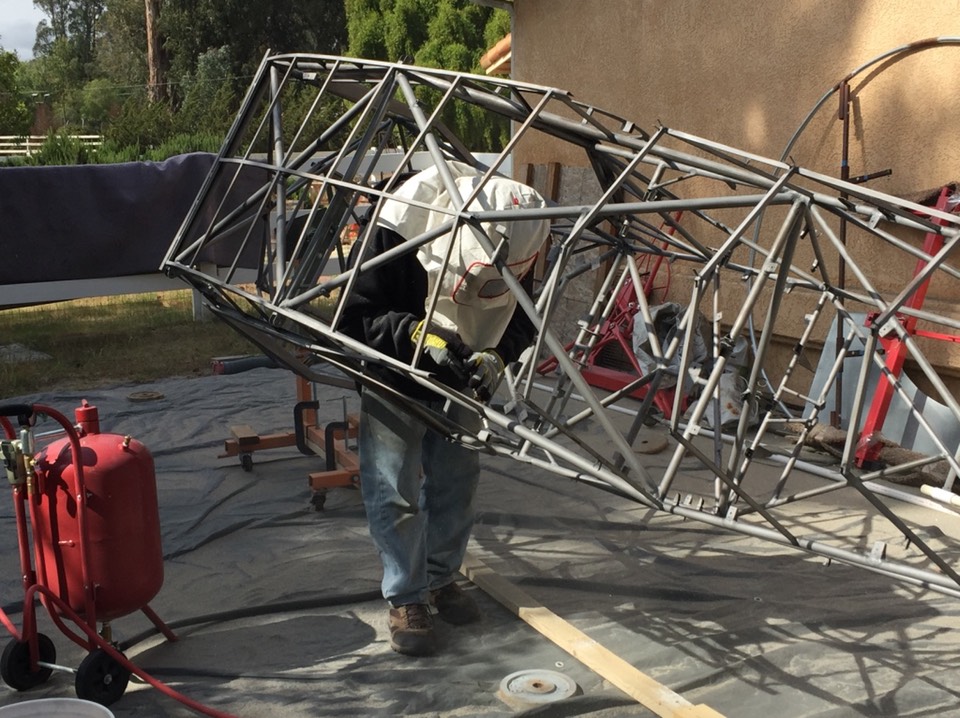

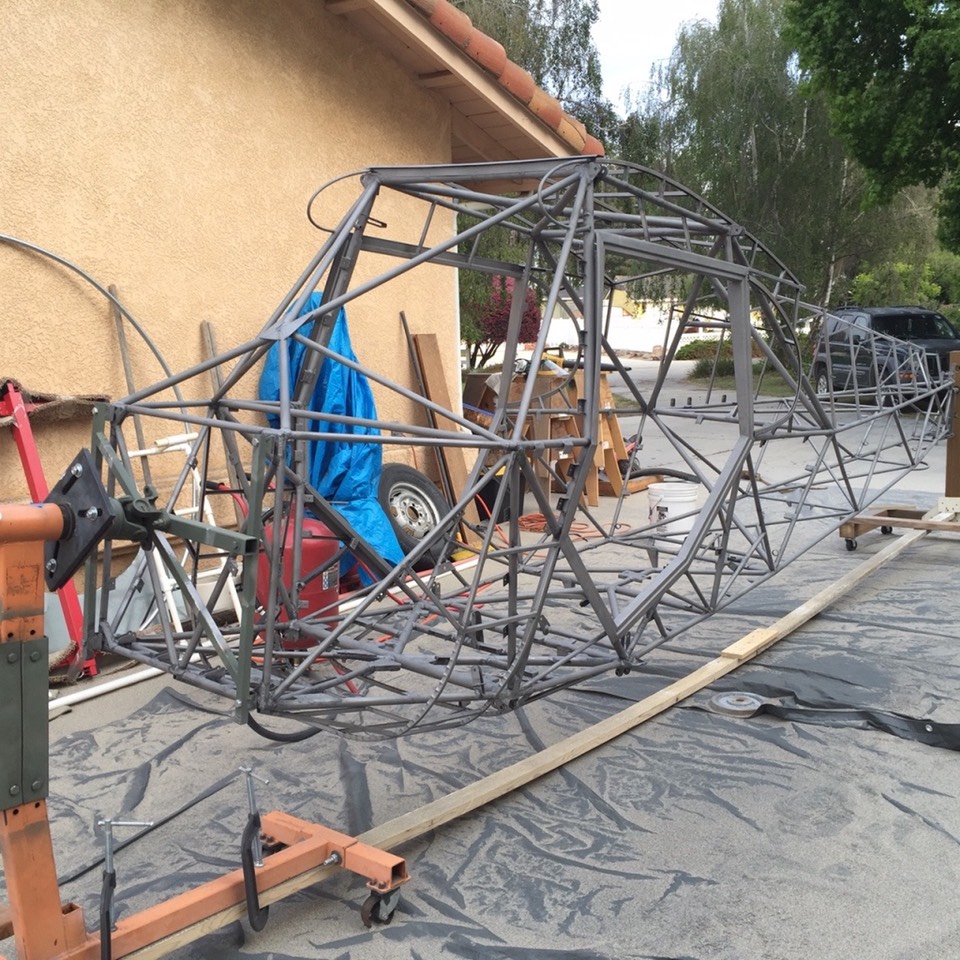
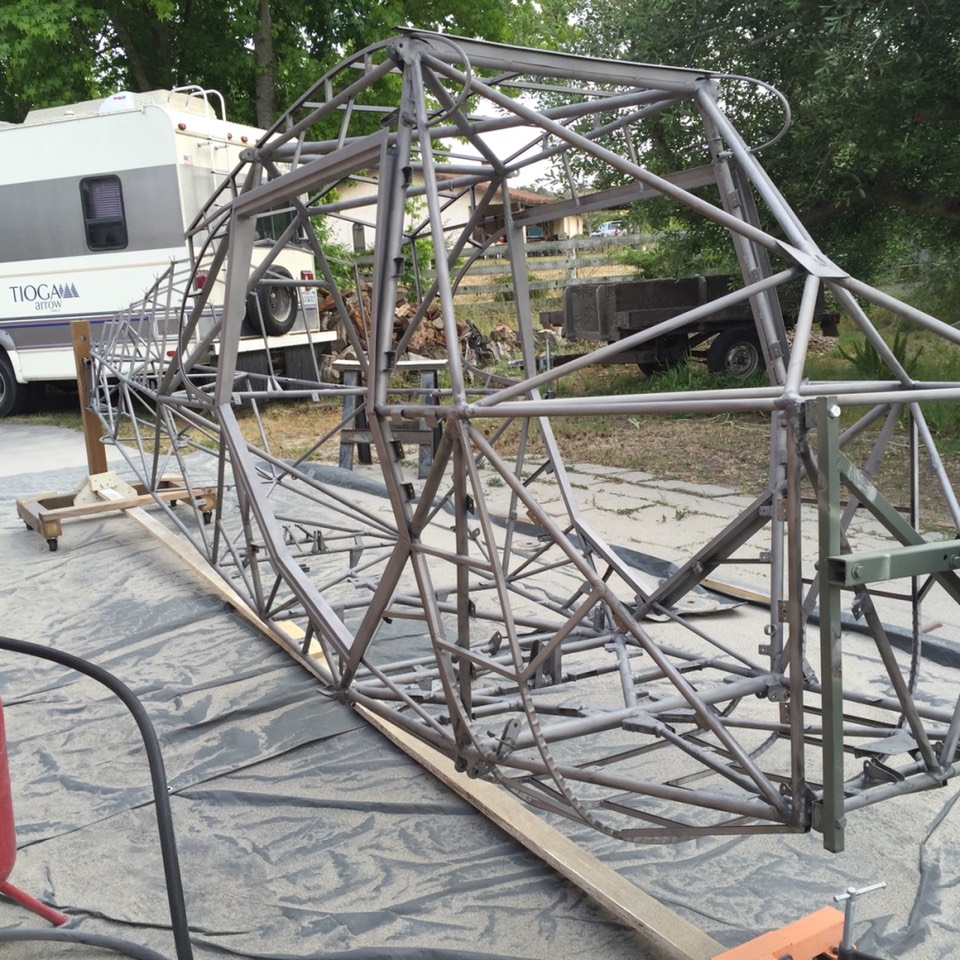
Fuselage finished and ready to prime. Make sure you prime the fuselage ASAP otherwise flash rust will start to form right away. I primed the next morning. Next step was the priming and painting of the fuselage.
Return to Past Posts and Pictures by Date